
Epson Stylus Photo 1390 Driver:
Epson Stylus Photo 1390 Driver-
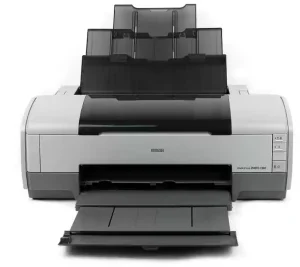
The new Epson printer boasts up to 5,760 x 1,440-dpi printing resolution and supports various paper types including Iron-on Cool Peel Transfer Paper and Photo Quality Self Adhesive Sheets.
Download Epson Stylus Photo 1390 Driver (Here)
To avoid damage to the FFC, tools without sharp ends should be used when removing the Front Paper Guide and CR Encoder Sensor Holder.
Ink System:
As with other Epson photo printers, the 1390 employs six ink cartridges: cyan, magenta, yellow, black light cyan, and light magenta. Each cartridge loads from its top slot into an extending tray at the front of the printer for direct printing onto paper or CD/DVD media for camcorders or smaller 8cm disks used by digital cameras.
Epson includes its standard photo software with this printer, providing users with an impressive variety of printing options such as borders and templates. If users prefer having programs like Photoshop manage color conversion instead, they can disable Epson’s built-in color management – although doing so may prove somewhat counterintuitive: to access this option you must go beyond the default view and enter advanced mode first.
As part of our testing, the 1390 produced high-quality prints with vibrant colors and precise details. Although we observed some color shifting under different lighting conditions, this shouldn’t pose a significant problem to most users. If you need a 13-inch photo printer that excels at monochrome prints, consider investing in the Stylus Photo R2400; it has received high marks for its monochrome capabilities. Epson hasn’t upgraded its Stylus Photo line of dye-based models for over a decade, so the 1390 is an extremely welcome upgrade. It boasts higher resolution printing and has an ink drop size minimum of 1.5 picoliters; furthermore, it comes equipped with a faster, more precise DX5 MicroPiezo print head than its predecessor the 1280.
Paper Feed:
Page 5 The Stylus Photo 1390 features an Auto Platen Gap (APG) adjuster which automatically sets its platen gap for each type of paper being used, reducing paper misalignment or jamming.
Stylus Photo 1390 printers are capable of printing both cut sheet and envelope media types. Borderless printing for A4 and Letter size papers is supported, though when borderless printing is selected for certain media sizes the area that prints may be smaller than expected – either due to not matching paper type and thickness exactly or because there’s an inoperable reversing motor.
Therefore, proper APG adjuster maintenance is of utmost importance to attain high print quality. Below are the maintenance procedures.
CD/DVD Tray Base Lock Mechanism:
The CD/DVD Tray Base Lock Mechanism consists of the locking shaft 106 and stop pin 1a. When in its lower position, stopping 1a hooks onto the eject roller 91 to prevent it from opening when both PF Grounding Spring and CR Encoder Board Holder are under tension, keeping both at their set height above Platen Gap Adjuster without misaligning or jamming during operation.
CR Encoder Board Holder and PF Grounding Spring are integral parts of the Eject Roller Shaft, so during maintenance they must not be detached from it. Doing so would prevent its smooth rotation, properly align with PF Grounding Spring and PG Encoder Sensor calibration, and potentially result in failure to print accurately on certain types of paper.
Important: Before disassembling a printer, read and follow all precautions in this chapter exactly, as failure could cause severe damage or personal injury. Whenever possible, commercially available tools should be used when disassembly and assembly procedures take place.
Adjustment Items:
Stylus Photo 1390 users who encounter media that exceeds the size indicated by their CD/DVD Tray Sensor may encounter an error message on the LC display that indicates their LD Roller cannot grasp their media properly and that their CD/DVD Tray should be opened manually due to misalignment between LD Roller and CD/DVD Tray Base Lock Mechanism.
Correct this problem by aligning the LD Roller with the locking lever of the CD/DVD Tray Base Lock Assembly and tightening its screw. This will ensure that its engagement is proper with CD/DVD Tray Base Lock assembly, thus guaranteeing correct paper feeding.
Before any disassembly or reassembly process, make sure that the printer is completely switched off and unplugged from its power source. Also, ensure all cables and FFCs have been unconnected from their connectors on the Relay Board – see Section 4.2.1.5 on page 82 for proper disassembly procedures.