HTC Vive Driver:
The HTC Vive is a virtual reality headset developed by HTC in partnership with Valve. It consists of two base stations, a headset, and two controllers. The controllers have a multi-use trackpad, grip buttons, trigger buttons, menu buttons, and system buttons.
Download HTC Vive Driver (Here)
It’s a good idea to check that all cables are connected properly. It’s also worth noting that the different components might occasionally need firmware updates which require plugging them into your PC.
The Vive Controller:
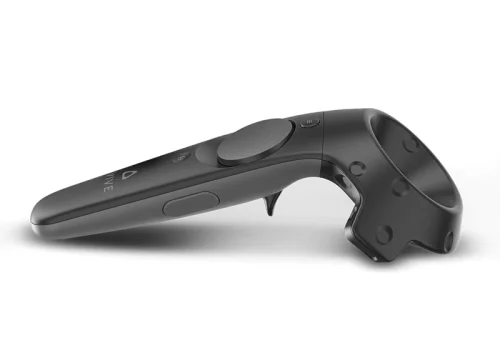
The Vive Controllers are the hand-held companion devices to the HTC Vive headset and allow players to interact directly with virtual reality games. These feature a multi-use trackpad, grip buttons, and a trigger, menu, and system button along with directional audio and HD haptic feedback. Each comes with a USB charging cable and battery which can last up to 6 hours on a single charge.
During the initial setup, the software will talk you through pairing your controllers and linking them to your system. The process is fairly straightforward as long as the controllers are fully charged.
If the controllers are not working properly, it could be a problem with your power supply. You should make sure the adapter is not overheating, which can cause erratic functionality. Try pointing a portable fan directly at the adapter or giving it a break in usage to maintain a cool temperature. You can also check if your computer is running any night mode settings, which can interfere with the headset’s display.
The Link Box:
The Link Box is the device that connects the headset to the PC. Providing the system with the power it needs and enabling video signals to be transmitted to the headset. It also provides signal amplification and additional power management functions.
On the ‘PC side’ of the Link Box, there are spaces for HDMI and USB cables. However, the Pro model has done away with this and instead has a single proprietary cable leading to the headset which unites power, data, and video.
The link box can sometimes get hot, causing it to shut down the headset and halt VR functionality until it cools down again. Try to maintain cool temperatures by pointing a portable fan directly at the device, or by strategically planning breaks in use. Also, it can help to restart the computer to make sure the link box is re-registered with SteamVR. This may resolve the issue if it is simply a case of an error message due to a corrupted database or other server issues.
The Headset:
The Vive headset looks quite a bit like the Rift but it fits better and doesn’t feel so front-heavy. It also has a fabric overhead strap with Velcro for adjustments, which is a nice touch.
The headset itself has two 1080 x 1200 panels for a combined 2160 x 1200 resolution and runs at 90Hz. The Vive combines this with a number of sensors to use room-scale VR. Which lets you walk around and move in a virtual space and interact with it using motion-tracked controllers.
The headset is accompanied by a pair of wireless Vive controllers and a breakout box. Which connects to the headset and your PC via USB. It’s a little more cumbersome than the Rift’s attachment. Which simply connects to your graphics card and a couple of USB ports, but it adds a lot of functionality to the system and provides an extra power supply. It also comes with a cloth to wipe down the lenses and a bunch of cables and adapters.
The Power Supply:
The HTC Vive Driver uses a dedicated 30W power adapter that is designed by the company. It is not compatible with any other brands of power supplies and can only be used in the recommended setup.
The power adapter is also prone to overheating, which will cause your VR experience to break down until it cools down. You can help prevent overheating by pointing a portable fan at the power supply or by strategically planning breaks in usage.
The headset will need to be cleared of furniture or other potential tripping hazards and the Lighthouse sensors should be mounted in opposite corners of your VR play area with about 2M of space between them. Once this is done you can begin the software and hardware setup process. Once the room-scale setting is complete you can begin to play games and experiences that are available in the Metaverse. Cosmos controllers have a battery life of between four and eight hours. So make sure you keep some spare batteries on hand.

